
Financial management is an integral part of any business’s success. It involves a bank reconciliation process to ensure that your NetSuite account balance matches the bank balances at the end of each financial period. A business can quickly identify its liquidity status with an accurate bank balance in the books.
NetSuite supports the reconciliation of bank data and credit card statements. The Intelligent Transaction Matching feature runs the Reconciliation Rules set in the system to automatically match imported data, while the remaining unmatched data can be manually reconciled on the Match Bank Data page.
This article shows the available features in NetSuite Product Release 2021.2. Note that the Reconcile Bank Statement and Reconcile Credit Card Statement features are no longer supported with this release; these have been replaced with the Match Bank Data feature, where imported bank data is matched with NetSuite recorded transactions.
Permissions and Features
To perform bank reconciliation tasks, assign these permissions to the corresponding roles. Go to Setup > Users/Roles > Manage Roles (Administrator). Consider the restrictions applied to the Employee record and the Role: Subsidiary, Department, Location, and Class. Usually, these permissions are assigned to roles with the Accounting Center UI. Modify the minimum access level to fit your business requirements.
You can install these free NetSuite SuiteApps to link your bank accounts to NetSuite:
- Banks Feeds SuiteApp
- Automated Bank Statement Import (ABSI) SuiteApp
The table below describes important permissions in NetSuite.

Using Rules
Using Rules
Process Overview
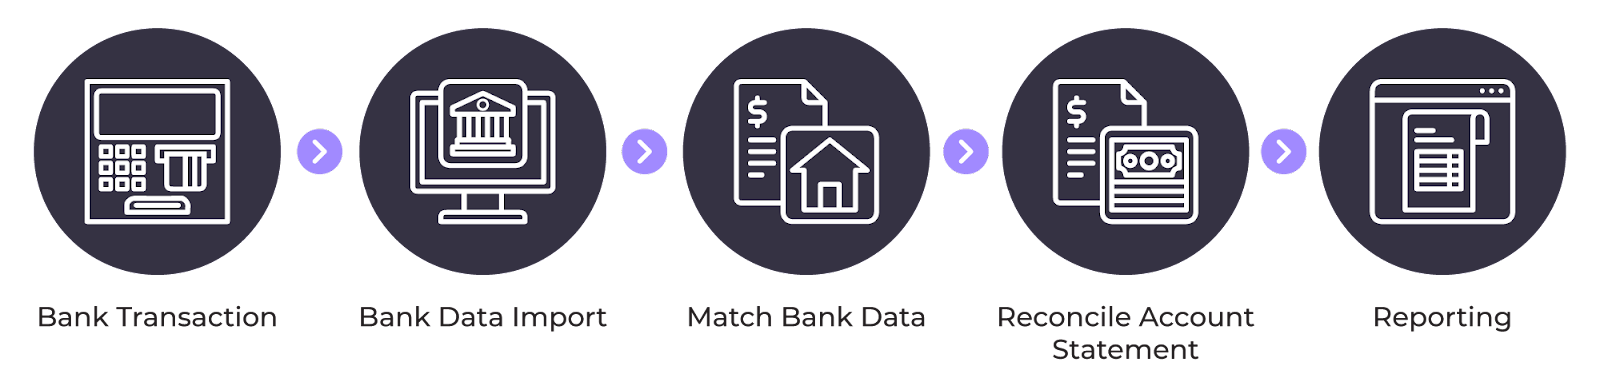
NetSuite Bank Reconciliation is an end-to-end process that starts with recording transactions, such as the payment of vendor bills or receiving funds from paid customer invoices. After recording transactions, proceed to upload bank data to the NetSuite instance. Then NetSuite transactions are matched and cleared with bank transactions, followed by reconciling the ending balance in NetSuite with the ending balance in the bank statement. Various reports are available for management reporting purposes.
Reconciliation Steps
The following sections show the details of the process overview above; this will help you better understand how the reconciliation works in NetSuite and how to take advantage of the different process automation options available. A role with Accounting Center UI is used for the navigation paths.
Match Bank Data
On the NetSuite Match Bank Data UI, the bank data imported is shown in the left table, while the Bank transactions entered in NetSuite are in the right table. The lines contained in each table are matched with each other. The matching relationship between the bank transaction line and NS transaction line can be one to one, one to many, or many to many.

- Go to Financial > Banking > Match Bank Data.
- In the Account field, select the bank account you want to reconcile.
Note: The Currency, Subsidiary, Bank Balance, and Balance as of fields will be auto-populated. Unmatched Bank Data imported is in the left table.
- Update your bank data:
➢ Automatic: Click the Update Imported Bank Data button to run the Auto Bank Statement Import SuiteApp.
Note: You must configure your NetSuite account with a bank connection to use this.
➢ Manual: Click the Upload File button.
Note: Use one of the accepted file types: CSV, OFX, QFX, BAI2, or CAMT.053.
- Click the Imported Bank Data refresh button to add any new lines imported.
- Click the NS Transactions refresh button to add any new recorded transactions.
- Refine your data as needed:
➢ Use the From-To Date filters and Transaction type filters to refine the lines shown.
➢ Use keywords in the Search field to find transactions.
➢ Click on the field headers (i.e., Date, Type, Tran No. Name, Memo) to sort data in ascending or descending order.
- Click the Run Reconciliation Rules button to automatically reconcile the NS transaction lines with the bank transaction lines. The remaining unmatched data can be manually reconciled by following the succeeding steps.
- Mark the checkbox beside the account and bank transaction lines you want to reconcile. You can also use Mark All or Unmark All. As lines are selected, these will be added to the table on the lower part of the page.
- The amount in the Difference field must be zero for the Match button to be available. If the difference is because of an unrecorded transaction, you can use the buttons below as appropriate (a pop-up window will appear; fill in the data as you usually would). This will create a new record in NetSuite.
➢ Click Add Deposit to record funds received, like customer payments.

➢ Click Add Charge to record disbursements like vendor payments.

➢ Click Add Journal Entry to record any other adjustments.
Note: The created records will be added to the right table and automatically marked as selected.
- Click the Match button to reconcile the selected lines. On the Review sub-tab, the line’s status is Matched.
- Click the Clear button to clear any NS transaction line without matching it to a bank transaction. On the Review sub-tab, the line’s status is Cleared.
- Click the Exclude button to exclude any bank transaction line from the reconciliation process. On the Excluded sub-tab, mark the checkbox and click the Restore button to revert the line to the To Be Matched sub-tab.

- On the Review subtab, you can see the previously matched lines. Click the Matched > Unmatched or Cleared > Undo Clear buttons to revert the lines to the To Be Matched sub-tab.

- Click the Submit button once done with the review. NetSuite will clear the transactions.
- Go to Financial > Banking > Match Bank Data > Status to view the submission status.
Reconcile Account Statement
After matching transaction lines, identify the bank statement's ending statement balance and date and input in the appropriate fields on the Reconcile Account Statement page. Consider possible additional bank transactions when determining the ending statement date. Proceed to close the account statement for the period. If there’s no previously reconciled Account Statement, the Last Reconciled Balance field will show zero.
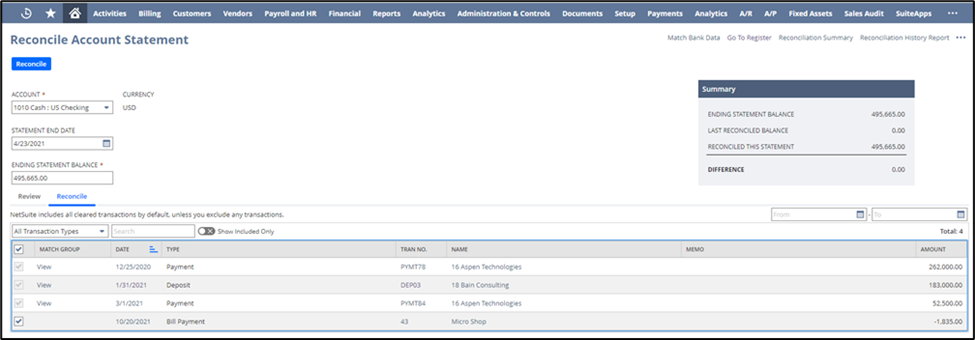
1. On the Match Bank Data page, click the Reconcile Account Statement button. Alternatively, you may navigate to Financial > Banking > Reconcile Account Statement.
2. In the Account field, select the account you want to reconcile.
3. Fill in the Statement End Date field with the bank account’s statement end date.
Note: If you received more transactions later in the day of the statement end date, you cannot choose these transactions in your next account reconciliation statement.
4. Fill in the Ending Statement Balance field with the bank account’s ending balance. This field will be auto-populated with the latest imported statement, if available.
5. The Last Reconciled Balance is filled with the last reconciled account statement balance.
6. In the Reconcile sub-tab, review the items included in the reconciliation. Mark or unmark the checkbox as needed.
Note: Any excluded transaction from the reconciliation will retain its status as Matched and Cleared. If the matching relationship of transactions is either one-to-many or many-to-many, the checkbox is unavailable. Click the View button to include or exclude the transactions.
7. Click the Matched or Cleared button in the Review sub-tab to view the transaction details. Click the Undo Match or Undo Clear button to move a transaction back to the Match Bank Data page.
8. Click the Reconcile button once done with the review and confirm that the difference is zero.
9. On the pop-up window, click the OK button.
10. Go to Financial > Banking > Reconcile Account Statement > List to see the status of the Reconciled Statements.
Reports
Reports related to the Banking process are available and customizable to your needs. Go to Reports > Banking/Budgeting and select from the different standard reports available:
➢ Bank Register
➢ Cash Statement
➢ Reconciliation
Frequent Errors
Below are some of the frequent errors encountered by other NetSuite users. Read through this list to learn some tips and tricks as well.
Bank Data Import Assistant CSV Mapping Error
Many users encounter errors when importing data via CSV upload templates in NetSuite. These errors arise from incorrect one-to-many mappings or characters used. Take a look at the table below on how to correctly fill out a CSV template for bank data import.
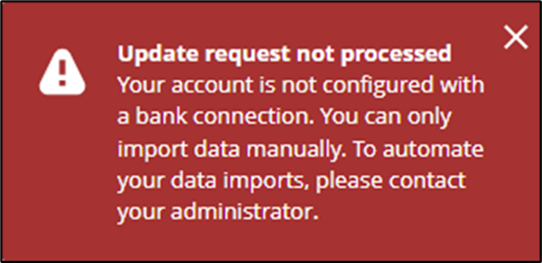
Update Imported Bank Data Button Resulted in Error
The account’s bank connection is not configured. Contact your Administrator for more information.
Bank Data Import Status is “Complete,” but No Data Is Reflected on the Match Bank Data Page
Go to Financial > Lists > Accounts. Check if the checkbox below is enabled.

Bank Data Uploaded Manually (CSV File) Failed
Go to Financial > Banking > Banking Import History. Check if the Import Status is Completed or Failed. If the latter, review the data in the CSV file to ensure that your data follows the data field restrictions. Remove any unnecessary columns or data. Also, these are the parameters used by the Reconciliation Rules feature, if you have set this up.
Limitations
There are some limitations with the current NetSuite Bank Reconciliation feature, some of which are listed below. Read through this to identify some workarounds that you can use if needed.
- If you’re finished with the account reconciliation and find that there are new transactions for that day, you need to delete the account reconciliation and redo the process. Go to Financial > Banking > Reconcile Account Statement > List, and click the Delete button for the last reconciled account.
- Bank statements uploaded automatically or manually are not saved in your NetSuite, for security purposes.
- The system processes Automatic Bank Data Import once a day, depending on your time zone. You can manually trigger the data import in the Match Bank Data page using the Update Imported Bank Data button. Such an initiation is only allowed every 60 minutes for each format profile.
Best Practices
Here are the best practices identified by different NetSuite users. These can provide insight into how you can be more effective and efficient in the bank reconciliation process.
- Using an administrator role, set up reconciliation rules to automate the matching of transactions upon importing bank data. Go to Transaction > Bank > Reconciliation Rules. Click the New Rules button to create a new rule.

- When processing the Reconcile Account Statement, select a day before the current date for the Statement End Date field to ensure that any newly imported data can be included in the next reconciliation.
- If you’re not using the Bank Feeds SuiteApp, it is best not to exceed 10,000 transactions per import.
Conclusion
NetSuite Bank Reconciliation provides the overall functionality needed for the monthly bank reconciliation process. It is recommended to leverage the available automated features, including matching transactions and data importations, to make your reconciliation process more efficient and less prone to errors. As you repeat the process, you will become more familiar with the functions and features of NetSuite. You might also develop your own best practices that you can share across your organization. Watch out for the new NetSuite product releases to stay up to date with new and deprecated features.
NetSuite Bank Reconciliation provides the overall functionality needed for the monthly bank reconciliation process. It is recommended to leverage the available automated features, including matching transactions and data importations, to make your reconciliation process more efficient and less prone to errors. As you repeat the process, you will become more familiar with the functions and features of NetSuite. You might also develop your own best practices that you can share across your organization. Watch out for the new NetSuite product releases to stay up to date with new and deprecated features.


